Pages

Sunday, March 31, 2013

FTU - Shop Til You Drop

This tutorial was written by me on March 31st, 2013 Please do not claim as your own. Any resemblance to any other tutorial is purely coincidental.
------------------------------------------------
Mask Of Choice - Mask 363 Here

Scrap Kit - FTU Scrap kit By Gimptastic Tuts Called Shop Til You Drop
You can download this kit here

Font Of Choice 

Tube Of Choice -  Artwork Of Keith Garvey. You must have the proper license to use his work. You can visit his store here.

Program - Gimp 2.6..but any program will do.

--------------------------------------------

Open New Canvas
I did 650x650. You can resize it at the end if you would like.

Open Mask
Right click on your layers 
Go down to alpha by selection
Edit > fill w/ BG color - Make sure color is #FFFFFF

Open Paper 9
Right click on your layers
Click add layer mask
Then a window will pop up 
then click black (full transparency)
Then click add
Edit > Copy 
Edit > Paste
On Layers > click on floating selection
Then right click on layers
scroll down to anchor layer
Delete first layer!!!

You should have a mask..then a black square next to it on your layers.
Image > Merge Visible Layers 
Box should pop up..click clipped to image > Merge

-----------------------------------------------------------------

Ready...
Set...
Go...

Open  Frame
Use your rectangle tool and make a square on paper 6
Copy
Paste as new layer on Frame1

Open These Elements and use the same dropshadow as above. 

Scatter
CityScape
Blue Bag
Purple Bag
Bottle
Credit Card
Money
Sunglasses
Wallet
Nail Polish
Dollar Sign
Lotion
Clock
Heel
Brush
Lipstick
3 Way Mirror

Open up your tube and place it in the middle
Open tube again and place inside of frame
Change mode to Hard Light
Duplicate tube and place on right side of half body tube

Now dropshadow your elements with these settings.

Filters, Light And Shadows...DropShadow
Offset X - 9
Offset Y - 9
Blur Radius - 15
Opacity - 60
Color - #000000
Allow Resizing

Now merge all layers together
Duplicate tag
Filters > Blur > Motion Blur > Radial > Default Settings
Change mode to soft light
Merge Again

Now resize your tag to 600x600 if you would like. 

When you are happy with your tag..
Add Copyright!!
Add Name!!
Merge All Layers!
Save!
Enjoy!!

Hope you enjoyed my tutorial. If you have done any of my tutorials, I would love to see your results. 
You may send them to brysonsmommy2009@gmail.com


Photobucket

Saturday, March 30, 2013

PTU - Garden Delight

This tutorial was written by me on March 30th, 2013 Please do not claim as your own. Any resemblance to any other tutorial is purely coincidental.
------------------------------------------------
Mask Of Choice - Here

Scrap Kit - PTU kit by Krissys Scraps Called Garden Delights
You can purchase this kit here

Font Of Choice 

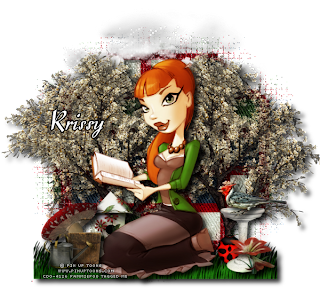
Tube Of Choice - Artwork By Pin Up Toons. You must have a license to use this tube. You can find this tube at CDO

Program - Gimp 2.6..but any program will do.

--------------------------------------------

Open New Canvas
I did 650x650.you can resize it at the end if you would like.

Open Mask
Right click on your layers 
Go down to alpha by selection
Edit > fill w/ BG color - Make sure color is #FFFFFF

Open Paper 12
Right click on your layers
Click add layer mask
Then a window will pop up 
then click black (full transparency)
Then click add
Edit > Copy 
Edit > Paste
On Layers > click on floating selection
Then right click on layers
scroll down to anchor layer
Delete first layer!!!

You should have a mask..then a black square next to it on your layers.
Image > Merge Visible Layers 
Box should pop up..click clipped to image > Merge

-----------------------------------------------------------------

Ready...
Set...
Go...

Open These Elements and use the same dropshadow as above. 

Beetle1
Bird Bath
Cloud
Bird House
Grass
Mushroom
Natural Flower
Painted Bird
Cherry Tree (duplicate 1x)
Watering Can
Wooded Pail

Open up your tube and place it in the middle
Open tube again and place in chained frame
Change mode to overlay
Duplicate tube and place on right side of half body tube

Now dropshadow your elements with these settings.

Filters, Light And Shadows...DropShadow
Offset X - 9
Offset Y - 9
Blur Radius - 15
Opacity - 60
Color - #000000
Allow Resizing

Now merge all layers together
Duplicate tag
Filters > Blur > Motion Blur > Radial > Default Settings
Change mode to soft light
Merge Again

Now resize your tag to 600x600 if you would like. 

When you are happy with your tag..
Add Copyright!!
Add Name!!
Merge All Layers!
Save!
Enjoy!!

Hope you enjoyed my tutorial. If you have done any of my tutorials, I would love to see your results. 
You may send them to brysonsmommy2009@gmail.com


Photobucket

Friday, March 29, 2013

FTU - Rhapsody In Blue

This tutorial was written by me on March 29th, 2013 Please do not claim as your own. Any resemblance to any other tutorial is purely coincidental.
------------------------------------------------
Mask Of Choice - Here

Scrap Kit - FTU scrap kit by Gimptastic Tuts called Rhapsody In Blue
You can download the kit here

Font Of Choice 

Tube Of Choice - Fairy tube by HornyRoo
You can find it here

Program - Gimp 2.6..but any program will do.

--------------------------------------------

Open New Canvas
I did 650x650.you can resize it at the end if you would like.

Open Mask
Right click on your layers 
Go down to alpha by selection
Edit > fill w/ BG color - Make sure color is #FFFFFF

Open Paper 8
Right click on your layers
Click add layer mask
Then a window will pop up 
then click black (full transparency)
Then click add
Edit > Copy 
Edit > Paste
On Layers > click on floating selection
Then right click on layers
scroll down to anchor layer
Delete first layer!!!

You should have a mask..then a black square next to it on your layers.
Image > Merge Visible Layers 
Box should pop up..click clipped to image > Merge

-----------------------------------------------------------------

Ready...
Set...
Go...

Open  Frame3
Use your rectangle tool and make a circle on paper 6
Copy
Paste as new layer on Frame3

Open These Elements and use the same dropshadow as above. 

Berries
Bird
Birdhouse
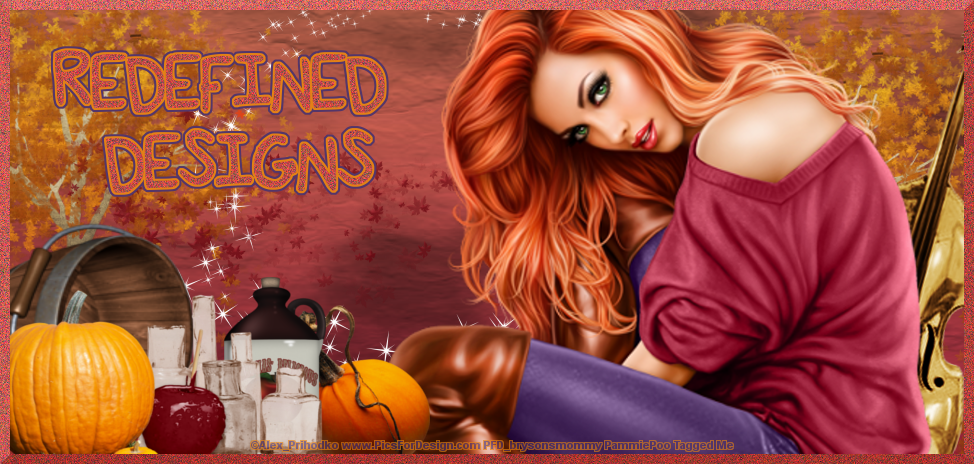
Bottles
Bucket
Bunny
Fairy
Fairy Dust
Flower 2
Grass (duplicate 2x)
Moon
Tree
Violin

Open up your tube and place it in the middle
Open tube again and place in chained frame
Change mode to overlay
Duplicate tube and place on right side of half body tube

Now dropshadow your elements with these settings.

Filters, Light And Shadows...DropShadow
Offset X - 9
Offset Y - 9
Blur Radius - 15
Opacity - 73
Color - #000000
Allow Resizing

Now merge all layers together
Duplicate tag
Filters > Blur > Motion Blur > Radial > Default Settings
Change mode to soft light
Merge Again

Now resize your tag to 600x600 if you would like. 

When you are happy with your tag..
Add Copyright!!
Add Name!!
Merge All Layers!
Save!
Enjoy!!

Hope you enjoyed my tutorial. If you have done any of my tutorials, I would love to see your results. 
You may send them to brysonsmommy2009@gmail.com


Photobucket

FTU - Easter Bliss

This tutorial was written by me on March 29th, 2013 Please do not claim as your own. Any resemblance to any other tutorial is purely coincidental.
------------------------------------------------
Mask Of Choice - Here

Scrap Kit - FTU scrap kit called "Easter Bliss" By Designs By Vaybs
You can download this kit here

Font Of Choice

Tube Of Choice - Artwork By Pin Up Toons. You must have proper license to use this tube.
You can find this tube here at CDO

Program - Gimp 2.6..but any program will do.

--------------------------------------------

Open New Canvas
I did 650x650.you can resize it at the end if you would like.

Open Mask
Right click on your layers
Go down to alpha by selection
Edit > fill w/ BG color - Make sure color is #FFFFFF

Open Paper 2
Right click on your layers
Click add layer mask
Then a window will pop up
then click black (full transparency)
Then click add
Edit > Copy
Edit > Paste
On Layers > click on floating selection
Then right click on layers
scroll down to anchor layer
Delete first layer!!!

You should have a mask..then a black square next to it on your layers.
Image > Merge Visible Layers
Box should pop up..click clipped to image > Merge

-----------------------------------------------------------------

Ready...
Set...
Go...

Open Element20
Use your ellipse tool and make a circle on paper 6
Copy
Paste as new layer on Element20

Open These Elements and use the same dropshadow as above.

Element16
Element19
Element25
Element3
Element30
Element46
Element53 (duplicate 3x)
Element55

Open up your tube and place it in the middle
Erase the extra if shows
Change mode to overlay
Duplicate tube and place on right side of half body tube

Open full body tube

Now dropshadow your elements with these settings.

Filters, Light And Shadows...DropShadow
Offset X - 9
Offset Y - 9
Blur Radius - 15
Opacity - 60
Color - #000000
Allow Resizing

Now merge all layers together
Duplicate tag
Filters > Blur > Motion Blur > Radial > Default Settings
Change mode to soft light
Merge Again

Now resize your tag to 600x600 if you would like.

When you are happy with your tag..
Add Copyright!!
Add Name!!
Merge All Layers!
Save!
Enjoy!!

Hope you enjoyed my tutorial. If you have done any of my tutorials, I would love to see your results.
You may send them to brysonsmommy2009@gmail.com

Photobucket

Thursday, March 28, 2013

PTU - Raven Princess


This tutorial was written by me on March 28th, 2013 Please do not claim as your own. Any resemblance to any other tutorial is purely coincidental.
------------------------------------------------
Mask Of Choice

Scrap Kit - PTU kit by Sweet Addictionz Scraps Called "Happy Easter"
You can purchase this kit at any of the stores Kaci sell at.
You can find them here at her blog

Font Of Choice

Tube Of Choice - Artwork By VeryMany. You must have proper license to use this tube.
You can find this tube here at PFD.

Program - Gimp 2.6..but any program will do.

--------------------------------------------

Open New Canvas
I did 650x650.you can resize it at the end if you would like.

Open Mask
Right click on your layers
Go down to alpha by selection
Edit > fill w/ BG color - Make sure color is #FFFFFF

Open Paper 2
Right click on your layers
Click add layer mask
Then a window will pop up
then click black (full transparency)
Then click add
Edit > Copy
Edit > Paste
On Layers > click on floating selection
Then right click on layers
scroll down to anchor layer
Delete first layer!!!

You should have a mask..then a black square next to it on your layers.
Image > Merge Visible Layers
Box should pop up..click clipped to image > Merge

-----------------------------------------------------------------

Ready...
Set...
Go...

Open  Frame4
Use your ellipse tool and make a circle on paper 6
Copy
Paste as new layer on Frame4

Open These Elements and use the same dropshadow as above.

Element8
Element4
Tree
Lamp Post
Element38
Element10
Element11
Element34
Element23
Element25
Element19
Sparkles (duplicate 3x)
Bird

Open up your tube and place it in the middle
Open tube again and place in chained frame
Change mode to overlay
Duplicate tube and place on right side of half body tube

Now dropshadow your elements with these settings.

Filters, Light And Shadows...DropShadow
Offset X - 4
Offset Y - 4
Blur Radius - 15
Opacity - 60
Color - #000000
Allow Resizing

Now merge all layers together
Duplicate tag
Filters > Blur > Motion Blur > Radial > Default Settings
Change mode to soft light
Merge Again

Now resize your tag to 600x600 if you would like.

When you are happy with your tag..
Add Copyright!!
Add Name!!
Merge All Layers!
Save!
Enjoy!!

Hope you enjoyed my tutorial. If you have done any of my tutorials, I would love to see your results.
You may send them to brysonsmommy2009@gmail.com

Photobucket

Wednesday, March 27, 2013

PTU - Happy Easter

This tutorial was written by me on March 27, 2013 Please do not claim as your own. Any resemblance to any other tutorial is purely coincidental.
------------------------------------------------
Mask Of Choice - Here

Scrap Kit - PTU kit by Sweet Addictionz Scraps Called "Happy Easter"
You can purchase this kit here

Font Of Choice 

Tube Of Choice - Artwork By Zlata_M. You must have proper license to use this tube.
You can find this tube here at PFD.

Program - Gimp 2.6..but any program will do.

--------------------------------------------

Open New Canvas
I did 650x650.you can resize it at the end if you would like.

Open Mask
Right click on your layers 
Go down to alpha by selection
Edit > fill w/ BG color - Make sure color is #FFFFFF

Open Paper 11
Right click on your layers
Click add layer mask
Then a window will pop up 
then click black (full transparency)
Then click add
Edit > Copy 
Edit > Paste
On Layers > click on floating selection
Then right click on layers
scroll down to anchor layer
Delete first layer!!!

You should have a mask..then a black square next to it on your layers.
Image > Merge Visible Layers 
Box should pop up..click clipped to image > Merge

-----------------------------------------------------------------

Ready...
Set...
Go...

Open  Frame1
Use your ellipse tool and make a circle on paper 6
Copy
Paste as new layer on Frame1

Open These Elements and use the same dropshadow as above. 

Element17
Element5 (duplicate 1x)
Element12
Element3
Element19
Element13
Element9
Element14

Open up your tube and place it in the middle
Open tube again and place in chained frame
Change mode to overlay
Duplicate tube and place on right side of half body tube

Now dropshadow your elements with these settings.

Filters, Light And Shadows...DropShadow
Offset X - 9
Offset Y - 9
Blur Radius - 15
Opacity - 60
Color - #000000
Allow Resizing

Now merge all layers together
Duplicate tag
Filters > Blur > Motion Blur > Radial > Default Settings
Change mode to soft light
Merge Again

Now resize your tag to 600x600 if you would like. 

When you are happy with your tag..
Add Copyright!!
Add Name!!
Merge All Layers!
Save!
Enjoy!!

Hope you enjoyed my tutorial. If you have done any of my tutorials, I would love to see your results. 
You may send them to brysonsmommy2009@gmail.com

Photobucket

Wednesday, March 20, 2013

CT Tags By My CT Ladies

My awesome ladies of my ct did another awesome job on tags with my newest kit "50 shades of rock"
You can find this kit at any of my stores I sell at.

Awesome tags by Cindy. Thank you Cindy!!!


This awesome tag was made by Kimmie!!! Thank you Kimmie.


Photobucket

NEW KIT IN STORES - 50 Shades Of Rock


This kit contains 35 rockin elements, 15 papers and 3 frames for all your design needs. 
You can find this kit at any of the stores i'm selling at on the left of my blog.

Tag I Made Using This Kit


Photobucket

Tuesday, March 19, 2013

PTU - Punky Sweet

This tutorial was written by me on March 19th, 2013 Please do not claim as your own. Any resemblance to any other tutorial is purely coincidental.
------------------------------------------------
Mask Of Choice - Here

Scrap Kit - PTU kit by Scottish Butterfly Scraps Called "Punky Sweet"
You can purchase this kit from Arthur Crowe's store here

You can visit Heidi's blog here

Font Of Choice 

Tube Of Choice - Artwork By VeryMany. You must have proper license to use this tube.
You can find this tube here at PFD.

Program - Gimp 2.6..but any program will do.

--------------------------------------------

Open New Canvas
I did 650x650.you can resize it at the end if you would like.

Open Mask
Right click on your layers 
Go down to alpha by selection
Edit > fill w/ BG color - Make sure color is #FFFFFF

Open Paper 3
Right click on your layers
Click add layer mask
Then a window will pop up 
then click black (full transparency)
Then click add
Edit > Copy 
Edit > Paste
On Layers > click on floating selection
Then right click on layers
scroll down to anchor layer
Delete first layer!!!

You should have a mask..then a black square next to it on your layers.
Image > Merge Visible Layers 
Box should pop up..click clipped to image > Merge

-----------------------------------------------------------------

Ready...
Set...
Go...

Open Chained Frame
Use your ellipse tool and make a circle on paper 6
Copy
Paste as new layer on Chained Frame

Open These Elements and use the same dropshadow as above. 

Glitter
Barbed Wire 2
Cupcake
Bracelet
Lollipop
Butterfly
Dangle
Glove
Bow
Collar
Lips

Open up your tube and place it in the middle
Open tube again and place in chained frame
Change mode to overlay
Duplicate tube and place on right side of half body tube

Now dropshadow your elements with these settings.

Filters, Light And Shadows...DropShadow
Offset X - 9
Offset Y - 9
Blur Radius - 15
Opacity - 72
Color - #000000
Allow Resizing

Now merge all layers together
Duplicate tag
Filters > Blur > Motion Blur > Radial > Default Settings
Change mode to overlay
Merge Again

Now resize your tag to 600x600 if you would like. 

When you are happy with your tag..
Add Copyright!!
Add Name!!
Merge All Layers!
Save!
Enjoy!!

Hope you enjoyed my tutorial. If you have done any of my tutorials, I would love to see your results. 
You may send them to brysonsmommy2009@gmail.com


Photobucket

FTU - Spring

This tutorial was written by me on March 19th, 2013 Please do not claim as your own. Any resemblance to any other tutorial is purely coincidental.
------------------------------------------------
Mask Of Choice 

Scrap Kit - FTU kit by Stacies Cakes Called "Thinking Of Spring
You can download this kit here

Font Of Choice 

Tube Of Choice - Artwork Of Zlata_M. You must have the proper license to use this tube. 
You can get this tube here at PFD.


Program - Gimp 2.6..but any program will do.

--------------------------------------------

Open New Canvas
I did 650x650.you can resize it at the end if you would like.

Open Mask
Right click on your layers 
Go down to alpha by selection
Edit > fill w/ BG color - Make sure color is #FFFFFF

Open Paper 4
Right click on your layers
Click add layer mask
Then a window will pop up 
then click black (full transparency)
Then click add
Edit > Copy 
Edit > Paste
On Layers > click on floating selection
Then right click on layers
scroll down to anchor layer
Delete first layer!!!

You should have a mask..then a black square next to it on your layers.
Image > Merge Visible Layers 
Box should pop up..click clipped to image > Merge

-----------------------------------------------------------------

Ready...
Set...
Go...

Open Frame1
Use your ellipse tool and make a circle on paper 5
Copy
Paste as new layer on frame1

Open These Elements and use the same dropshadow as above. 

Grass
Frame2 - Place behind frame1
Flower 1 (duplicate 1x)
Rainbow
Bunny
Branch

Open up your tube and place it in the middle

Now open up your closeup and place in frame 1
change mode to overlay
Duplicate and place on the right of your half body tube

Now dropshadow your elements with these settings.

Filters, Light And Shadows...DropShadow
Offset X - 9
Offset Y - 9
Blur Radius - 15
Opacity - 72
Color - #000000
Allow Resizing

Now merge all layers together
Duplicate tag
Filters > Blur > Motion Blur > Radial > Default Settings
Change mode to overlay
Merge Again

Now resize your tag to 600x600 if you would like. 

When you are happy with your tag..
Add Copyright!!
Add Name!!
Merge All Layers!
Save!
Enjoy!!

Hope you enjoyed my tutorial. If you have done any of my tutorials, I would love to see your results. 
You may send them to brysonsmommy2009@gmail.com


Photobucket

FTU - Spring On My Mind


This tutorial was written by me on March 19, 2013. Please do not claim as your own.  Any resemblance to any other tutorial is purely coincidental.

------------------------------------------------

Mask Of Choice 

Scrap Kit - FTU Kit by Stacie Cakes Called "Thinking Of Spring"
You can download the kit here

Font Of Choice 

Tube Of Choice - I Used The artwork Zlata_M. You must have the proper license to use this tube. You can find this tube at PFD

Program - Gimp 2.6..but any program will do.

Template - By Millie
You can download it here
---------------------------------------------

Open New Canvas
I did 900x900.you can resize it at the end

Open Mask
Right click on your layers 
Go down to alpha by selection
Edit > fill w/ BG color - Make sure color is #FFFFFF

Open Paper 2
Right click on your layers
Click add layer mask
Then a window will pop up 
then click black (full transparency)
Then click add
Edit > Copy 
Edit > Paste
On Layers > click on floating selection
Then right click on layers
scroll down to anchor layer
Delete first layer!!!

You should have a mask..then a black square next to it on your layers.
Image > Merge Visible Layers 
Box should pop up..click clipped to image > Merge

-----------------------------------------

Open New Canvas

Open Your Template
Delete The Credits

Right click on paper 2
Extract it and put it in your patterns folder in gimp 2.6 folder

Use your select by color tool
with the select by color..click on layer 1
Edit > Fill With Pattern 

Right click on paper 4
Extract it and put it in your patterns folder in gimp 2.6 folder

Use your select by color tool
with the select by color..click on layer 2
Edit > Fill With Pattern 

Right click on paper 5
Extract it and put it in your patterns folder in gimp 2.6 folder

Use your select by color tool
with the select by color..click on layers 3 & 4
Edit > Fill With Pattern 

Right click on paper 3
Extract it and put it in your patterns folder in gimp 2.6 folder

Use your select by color tool
with the select by color..click on layers 5 & 6
Edit > Fill With Pattern 

Right click on paper 2
Extract it and put it in your patterns folder in gimp 2.6 folder

Use your select by color tool
with the select by color..click on layers 7 
Edit > Fill With Pattern 

Right click on paper 1
Extract it and put it in your patterns folder in gimp 2.6 folder

Use your select by color tool
with the select by color..click on layer 8
Edit > Fill With Pattern 
----------------------------------------------------------------

Now that the hard part is over..you are ready to add elements and your tube

Add elements and use this drop shadow with these settings

Grass
Balloon
Rainbow
Cloud
Flower2
Bunny
Snail
Flower1


Drop Shadow - Filters, Light And Shadows...DropShadow
Offset X - 9
Offset Y - 9
Blur Radius - 15
Opacity - 80
Color - #000000
Allow Resizing

Open your full body tube. Place in middle of template. 

Now open your half body tube and place in layer 6
Move to the left of your full body tube
Change mode to grain merge.

Duplicate 1x
Move to the right of your full body tube

Now merge all elements layers together.
Colors > Desaturate 

Add Copyright!!

Add Name!!

Merge All Layers!

Save!

Enjoy!!
Photobucket

Monday, March 18, 2013

FTU - Dreaming Of You


This tutorial was written by me on March 18th, 2013. Please do not claim as your own.  Any resemblance to any other tutorial is purely coincidental.

------------------------------------------------

Mask Of Choice

Scrap Kit - FTU kit by Kittz at Kittz Kreationz Called Dreaming Of You
You can download the kit here

Font Of Choice

Tube Of Choice - I Used The artwork Keith Garvey. You must have the proper license to use his work.
You can visit his store here

Program - Gimp 2.6..but any program will do.

Template - Template 222 By Millie
You can download it here
---------------------------------------------

Open New Canvas
I did 650x650. .you can resize it at the end

Open Mask
Right click on your layers
Go down to alpha by selection
Edit > fill w/ BG color - Make sure color is #FFFFFF

Open Paper 5
Right click on your layers
Click add layer mask
Then a window will pop up
then click black (full transparency)
Then click add
Edit > Copy
Edit > Paste
On Layers > click on floating selection
Then right click on layers
scroll down to anchor layer
Delete first layer!!!

You should have a mask..then a black square next to it on your layers.
Image > Merge Visible Layers
Box should pop up..click clipped to image > Merge

-----------------------------------------

Open New Canvas

Open Your Template
Delete The Credits

- Right click on paper 3
Extract it and put it in your patterns folder in gimp 2.6 folder

Use your select by color tool
with the select by color..click on layer 1
Edit > Fill With Pattern

- Right click on paper 2
Extract it and put it in your patterns folder in gimp 2.6 folder

Use your select by color tool
with the select by color..click on layer 2
Edit > Fill With Pattern

- Right click on paper 1
Extract it and put it in your patterns folder in gimp 2.6 folder

Use your select by color tool
with the select by color..click on layers 3 & 4
Edit > Fill With Pattern

- Right click on layer 5
Extract it and put it in your patterns folder in gimp 2.6 folder

Use your select by color tool
with the select by color..click on layer 5
Edit > Fill With FG Color

- Right click on paper 4
Extract it and put it in your patterns folder in gimp 2.6 folder

Use your select by color tool
with the select by color..click on layer 6
Edit > Fill With Pattern

- Right click on paper 4
Extract it and put it in your patterns folder in gimp 2.6 folder

Use your select by color tool
with the select by color..click on layer 6
Edit > Fill With Pattern

- I added borders around some of the layers on the template

----------------------------------------------------------------

Now that the hard part is over..you are ready to add elements and your tube

Add elements and use this drop shadow with these settings

12 (dupicate 1x and place at the bottom of template)
48
6
36
13
20
Bottle Sampler
28
59
16
11
40

Drop Shadow - Filters, Light And Shadows...DropShadow
Offset X - 9
Offset Y - 9
Blur Radius - 15
Opacity - 80
Color - #000000
Allow Resizing

Open your full body tube. Place in middle of template.
Duplicate 1x
Change mode to overlay

Open half tube. Place in 7 & 8
Change mode to grain merge
Erase extra parts if needed

Now open your half body tube and place in layer 6
Move to the left of your full body tube
Change mode to grain merge.

Now merge all elements layers together.
Duplicate tag
Filters > Blur > Motion Blur> Radial > Default Settings

Add Copyright!!

Add Name!!

Merge All Layers!

Save!

Enjoy!!

Photobucket

FTU - Military Life

This tutorial was written by me on March 18th, 2013 Please do not claim as your own. Any resemblance to any other tutorial is purely coincidental.
------------------------------------------------
Mask Of Choice 

Scrap Kit - FTU scrap kit called "military life" by Dreamland Designs
You can download it here

Font Of Choice 

Tube Of Choice - Artwork Of Ted Hammond. You must have the proper license to use his work. 
You can visit his site here.

Program - Gimp 2.6..but any program will do.

--------------------------------------------

Open New Canvas
I did 650x650.you can resize it at the end if you would like.

Open Mask
Right click on your layers 
Go down to alpha by selection
Edit > fill w/ BG color - Make sure color is #FFFFFF

Open Paper 12
Right click on your layers
Click add layer mask
Then a window will pop up 
then click black (full transparency)
Then click add
Edit > Copy 
Edit > Paste
On Layers > click on floating selection
Then right click on layers
scroll down to anchor layer
Delete first layer!!!

You should have a mask..then a black square next to it on your layers.
Image > Merge Visible Layers 
Box should pop up..click clipped to image > Merge

-----------------------------------------------------------------

Ready...
Set...
Go...

Open Frame1
Use your ellipse tool and make a circle on paper 7
Copy
Paste as new layer on frame1

Open These Elements and use the same dropshadow as above. 

Label 1
Boots
Canteene
Dog Tags

Open up your tube and place it in the middle

Now dropshadow your elements with these settings.

Filters, Light And Shadows...DropShadow
Offset X - 9
Offset Y - 9
Blur Radius - 15
Opacity - 80
Color - #000000
Allow Resizing

Now resize your tag to 600x600 if you would like. 

When you are happy with your tag..
Add Copyright!!
Add Name!!
Merge All Layers!
Save!
Enjoy!!

Hope you enjoyed my tutorial. If you have done any of my tutorials, I would love to see your results. 
You may send them to brysonsmommy2009@gmail.com


Photobucket

PTU - Blushing Spring

This tutorial was written by me on March 18th, 2013 Please do not claim as your own. Any resemblance to any other tutorial is purely coincidental.
------------------------------------------------
Mask Of Choice - 149 By Designs By Vaybs
You can download the mask here

Scrap Kit - PTU scrap kit called "Blushing Spring" By Pink Princess Scraps
You can purchase this kit here

Font Of Choice 

Tube Of Choice - Artwork Of Keith Garvey. You must have the proper license to use his work. You can visit his store here.

Program - Gimp 2.6..but any program will do.

--------------------------------------------

Open New Canvas
I did 650x650.you can resize it at the end if you would like.

Open Mask
Right click on your layers 
Go down to alpha by selection
Edit > fill w/ BG color - Make sure color is #FFFFFF

Open Paper 4
Right click on your layers
Click add layer mask
Then a window will pop up 
then click black (full transparency)
Then click add
Edit > Copy 
Edit > Paste
On Layers > click on floating selection
Then right click on layers
scroll down to anchor layer
Delete first layer!!!

You should have a mask..then a black square next to it on your layers.
Image > Merge Visible Layers 
Box should pop up..click clipped to image > Merge

-----------------------------------------------------------------

Ready...
Set...
Go...

Open Element 94
Use your ellipse tool and make a circle on paper 11
Copy
Paste as new layer on element 94

Open These Elements and use the same dropshadow as above. 

Element 90
Element 91
Element 85
Element 22
Element 27
Element 62 
Element 52
Element 55
Element 54
Element 34
Element 39
Element 21
Element 14
Element 93
Element 72
Element 88
Element 89

Open up your tube and place it in the middle

Now dropshadow your elements with these settings.

Filters, Light And Shadows...DropShadow
Offset X - 9
Offset Y - 9
Blur Radius - 15
Opacity - 67
Color - #000000
Allow Resizing

Merge all layers together
Duplicate tag
Filters > Motion Blur > Radial > Default Settings
Change mode to overlay

Now resize your tag to 600x600 if you would like. 

When you are happy with your tag..
Add Copyright!!
Add Name!!
Merge All Layers!
Save!
Enjoy!!

Hope you enjoyed my tutorial. If you have done any of my tutorials, I would love to see your results. 
You may send them to brysonsmommy2009@gmail.com


Photobucket

Sunday, March 17, 2013

FTU - Sring Is Here

This tutorial was written by me on March 17th, 2013 Please do not claim as your own. Any resemblance to any other tutorial is purely coincidental.
------------------------------------------------
Mask Of Choice 

Scrap Kit - FTU Scrap Kit By Scraps by Jessica Art Design "Its Spring"
You can download the kit here

Font Of Choice 

Tube Of Choice - Artwork Of  Keith Garvey. You mus have the proper license to use his work. You can visit his store here.

Program - Gimp 2.6..but any program will do.

--------------------------------------------

Open New Canvas
I did 650x650.you can resize it at the end if you would like.

Open Mask
Right click on your layers 
Go down to alpha by selection
Edit > fill w/ BG color - Make sure color is #FFFFFF

Open Paper 4
Right click on your layers
Click add layer mask
Then a window will pop up 
then click black (full transparency)
Then click add
Edit > Copy 
Edit > Paste
On Layers > click on floating selection
Then right click on layers
scroll down to anchor layer
Delete first layer!!!

You should have a mask..then a black square next to it on your layers.
Image > Merge Visible Layers 
Box should pop up..click clipped to image > Merge

-----------------------------------------------------------------

Ready...
Set...
Go...

Open element 7
Use your ellipse tool and make a circle on paper 11
Copy
Paste as new layer on element 7

Open These Elements and use the same dropshadow as above. 

element 16
element 5
element 23 (duplicate 3x)
element 33 (dupliate 2x)
element 41
element 3 (duplicate 1x)

Open up your tube and place it in the middle

Now dropshadow your elements with these settings.

Filters, Light And Shadows...DropShadow
Offset X - 9
Offset Y - 9
Blur Radius - 15
Opacity - 69
Color - #000000
Allow Resizing

Now resize your tag to 600x600 if you would like. 

When you are happy with your tag..
Add Copyright!!
Add Name!!
Merge All Layers!
Save!
Enjoy!!

Hope you enjoyed my tutorial. If you have done any of my tutorials, I would love to see your results. 
You may send them to brysonsmommy2009@gmail.com


Photobucket