Pages

Sunday, August 31, 2014

PTU - Autumn Wind

This tutorial was written by me on August 31, 2014. Please do not claim as your own. Any resemblance to any other tutorial is purely coincidental.
------------------------------------------------
Mask Of Choice 

Scrap Kit - PTU scrap kit called Autumn Wind By Bibi's Collections
You can purchase this kit here

Font Of Choice 

Tube Of Choice -  Artwork By Danny Lee. You must obtain a license from S&Co to use this tube.

Program - Gimp 2.6..but any program will do.

--------------------------------------------

Open New Canvas
I did 650x650.you can resize it at the end if you would like.

Open Mask
Right click on your layers 
Go down to alpha by selection
Edit > fill w/ BG color - Make sure color is #FFFFFF

Open Paper 9
Right click on your layers
Click add layer mask
Then a window will pop up 
then click black (full transparency)
Then click add
Edit > Copy 
Edit > Paste
On Layers > click on floating selection
Then right click on layers
scroll down to anchor layer
Delete first layer!!!

You should have a mask..then a black square next to it on your layers.
Image > Merge Visible Layers 
Box should pop up..click clipped to image > Merge

-----------------------------------------------------------------

Ready...
Set...
Go...

Open up BIBIAUTUMN WINDS ELEMS (63)
Open paper 2 and use your rectangle tool to make a square
C/P inside BIBIAUTUMN WINDS ELEMS (63)

The elements I used were:

BIBIAUTUMN WINDS ELEMS (100)
BIBIAUTUMN WINDS ELEMS (101)
BIBIAUTUMN WINDS ELEMS (12)
BIBIAUTUMN WINDS ELEMS (16)
BIBIAUTUMN WINDS ELEMS (17)
BIBIAUTUMN WINDS ELEMS (2)
BIBIAUTUMN WINDS ELEMS (25)
BIBIAUTUMN WINDS ELEMS (32)
BIBIAUTUMN WINDS ELEMS (42)
BIBIAUTUMN WINDS ELEMS (5)
BIBIAUTUMN WINDS ELEMS (51)
BIBIAUTUMN WINDS ELEMS (54)
BIBIAUTUMN WINDS ELEMS (56)
BIBIAUTUMN WINDS ELEMS (60)
BIBIAUTUMN WINDS ELEMS (62)
BIBIAUTUMN WINDS ELEMS (88)
BIBIAUTUMN WINDS ELEMS (92)

Now dropshadow your elements with these settings.

Filters, Light And Shadows...DropShadow
Offset X - 9
Offset Y - 9
Blur Radius - 15
Opacity - 80
Color - #000000
Allow Resizing

Now resize your tag to 600x600 if you would like. 

When you are happy with your tag..
Add Copyright!!
Add Name!!
Merge All Layers!
Save!
Enjoy!!

Hope you enjoyed my tutorial. 

Friday, August 29, 2014

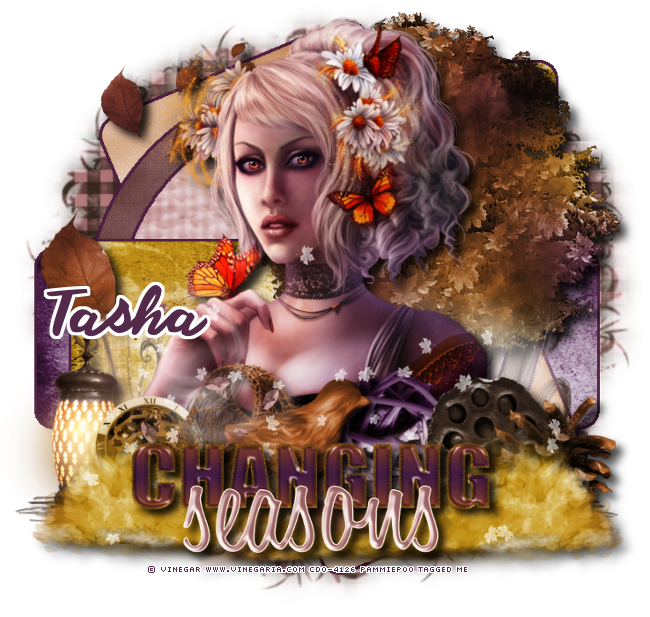
PTU - Changing Seasons

This tutorial was written by me on August 29, 2014. Please do not claim as your own. Any resemblance to any other tutorial is purely coincidental.
------------------------------------------------
Mask Of Choice 

Scrap Kit - PTU scrap kit called Changing Seasons By Tasha's Playground
You can purchase this kit here

Font Of Choice 

Tube Of Choice -  Artwork By Vinegar. You must obtain a license from CDO to use this tube.

Template Of Choice - I used Millie's template 671. You can download it here

Program - Gimp 2.6..but any program will do.

--------------------------------------------

Open New Canvas
I did 650x650.you can resize it at the end if you would like.

Open Mask
Right click on your layers 
Go down to alpha by selection
Edit > fill w/ BG color - Make sure color is #FFFFFF

Open Paper 3
Right click on your layers
Click add layer mask
Then a window will pop up 
then click black (full transparency)
Then click add
Edit > Copy 
Edit > Paste
On Layers > click on floating selection
Then right click on layers
scroll down to anchor layer
Delete first layer!!!

You should have a mask..then a black square next to it on your layers.
Image > Merge Visible Layers 
Box should pop up..click clipped to image > Merge

-----------------------------------------------------------------

Ready...
Set...
Go...

Open up the template in PSD format
Add each paper from scrapkit to the individual layers of the template.
Right click on template layer in layer box > Alpha to Selection > CTRL I > Select paper layer in layer box > Delete.

The papers I used for the template were:

TP_CS_paper04
TP_CS_paper05
TP_CS_paper07
TP_CS_paper10

The elements I used were:

TP_CS_e19
TP_CS_e25
TP_CS_e26
TP_CS_e27
TP_CS_e30
TP_CS_e42
TP_CS_e56
TP_CS_e57
TP_CS_e63
TP_CS_e64
TP_CS_wordart02

Now dropshadow your elements with these settings.

Filters, Light And Shadows...DropShadow
Offset X - 9
Offset Y - 9
Blur Radius - 15
Opacity - 80
Color - #000000
Allow Resizing

Now resize your tag to 600x600 if you would like. 

When you are happy with your tag..
Add Copyright!!
Add Name!!
Merge All Layers!
Save!
Enjoy!!

Hope you enjoyed my tutorial. 

Thursday, August 28, 2014

My Second Award

I received this award from Mary at Sweet As Honey Creations

Thank you so much for thinking of me. I'm honored.


Now i'm passing this on to some lovely ladies that deserve it. 

Leather And Lace Tuts

Tasha's Playground

Rhonda's Rockin Designz

Jackie's Jewels

PTU - Halloween Pumkin

This tutorial was written by me on August 28, 2014. Please do not claim as your own. Any resemblance to any other tutorial is purely coincidental.
------------------------------------------------
Mask Of Choice 

Scrap Kit - PTU scrap kit called Halloween Pumkin By ChaChaz Creationz
You can purchase this kit here

Font Of Choice 

Tube Of Choice -  Artwork By Danny Lee. Must obtain a license from S&Co to use this tube 

Program - Gimp 2.6..but any program will do.

--------------------------------------------

Open New Canvas
I did 650x650.you can resize it at the end if you would like.

Open Mask
Right click on your layers 
Go down to alpha by selection
Edit > fill w/ BG color - Make sure color is #FFFFFF

Open Paper 2
Right click on your layers
Click add layer mask
Then a window will pop up 
then click black (full transparency)
Then click add
Edit > Copy 
Edit > Paste
On Layers > click on floating selection
Then right click on layers
scroll down to anchor layer
Delete first layer!!!

You should have a mask..then a black square next to it on your layers.
Image > Merge Visible Layers 
Box should pop up..click clipped to image > Merge

-----------------------------------------------------------------

Ready...
Set...
Go...

Open These Elements and use the same dropshadow as above and resize to your liking!!!

Element1
Element10
Element11
Element12
Element24
Element49
Element50
Element51
Element52
Element53
Element57
Element6

Now dropshadow your elements with these settings.

Filters, Light And Shadows...DropShadow
Offset X - 9
Offset Y - 9
Blur Radius - 15
Opacity - 80
Color - #000000
Allow Resizing

Now resize your tag to 600x600 if you would like. 

When you are happy with your tag..
Add Copyright!!
Add Name!!
Merge All Layers!
Save!
Enjoy!!

Hope you enjoyed my tutorial. 

Wednesday, August 27, 2014

PTU - Gothic Maiden

This tutorial was written by me on August 27, 2014. Please do not claim as your own. Any resemblance to any other tutorial is purely coincidental.
------------------------------------------------
Mask Of Choice 

Scrap Kit - PTU scrap kit called Gothic Maiden By Disturbed Scraps
You can purchase this kit here

Font Of Choice 

Tube Of Choice -  Artwork By Andy Cooper. Must obtain a license from S&Co to use this tube 

Program - Gimp 2.6..but any program will do.

--------------------------------------------

Open New Canvas
I did 650x650.you can resize it at the end if you would like.

Open Mask
Right click on your layers 
Go down to alpha by selection
Edit > fill w/ BG color - Make sure color is #FFFFFF

Open Paper 3
Right click on your layers
Click add layer mask
Then a window will pop up 
then click black (full transparency)
Then click add
Edit > Copy 
Edit > Paste
On Layers > click on floating selection
Then right click on layers
scroll down to anchor layer
Delete first layer!!!

You should have a mask..then a black square next to it on your layers.
Image > Merge Visible Layers 
Box should pop up..click clipped to image > Merge

-----------------------------------------------------------------

Ready...
Set...
Go...

Open DS - GM Element0107
Now open paper8. Use your rectangle tool. 
Copy and paste into DS - GM Element0107

Open These Elements and use the same dropshadow as above and resize to your liking!!!

DS - GM Element003
DS - GM Element010
DS - GM Element0100
DS - GM Element0110
DS - GM Element013
DS - GM Element025
DS - GM Element030
DS - GM Element032
DS - GM Element037
DS - GM Element045
DS - GM Element047
DS - GM Element055
DS - GM Element081
DS - GM Element083
DS - GM Element088

Now dropshadow your elements with these settings.

Filters, Light And Shadows...DropShadow
Offset X - 9
Offset Y - 9
Blur Radius - 15
Opacity - 80
Color - #000000
Allow Resizing

Now resize your tag to 600x600 if you would like. 

When you are happy with your tag..
Add Copyright!!
Add Name!!
Merge All Layers!
Save!
Enjoy!!

Hope you enjoyed my tutorial. 

Sunday, August 24, 2014

PTU - Mystical

This tutorial was written by me on August 24, 2014. Please do not claim as your own. Any resemblance to any other tutorial is purely coincidental.
------------------------------------------------
Mask Of Choice 

Scrap Kit - PTU scrap kit called Mystical by BiBi's Collections
You can purchase this kit here

Font Of Choice 

Tube Of Choice -  Artwork By Di_Halim. Must obtain a license from S&Co to use this tube 

Program - Gimp 2.6..but any program will do.

--------------------------------------------

Open New Canvas
I did 650x650.you can resize it at the end if you would like.

Open Mask
Right click on your layers 
Go down to alpha by selection
Edit > fill w/ BG color - Make sure color is #FFFFFF

Open Paper 9
Right click on your layers
Click add layer mask
Then a window will pop up 
then click black (full transparency)
Then click add
Edit > Copy 
Edit > Paste
On Layers > click on floating selection
Then right click on layers
scroll down to anchor layer
Delete first layer!!!

You should have a mask..then a black square next to it on your layers.
Image > Merge Visible Layers 
Box should pop up..click clipped to image > Merge

-----------------------------------------------------------------

Ready...
Set...
Go...

Open These Elements and use the same dropshadow as above and resize to your liking!!!

BIBIMYSTICAL ELEMS (118)
BIBIMYSTICAL ELEMS (133)
BIBIMYSTICAL ELEMS (145)
BIBIMYSTICAL ELEMS (146)
BIBIMYSTICAL ELEMS (150)
BIBIMYSTICAL ELEMS (157)
BIBIMYSTICAL ELEMS (170)
BIBIMYSTICAL ELEMS (3)
BIBIMYSTICAL ELEMS (44)
BIBIMYSTICAL ELEMS (49)
BIBIMYSTICAL ELEMS (53)
BIBIMYSTICAL ELEMS (85)
BIBIMYSTICAL ELEMS (98)
BIBIMYSTICAL ELEMS (99)

Now dropshadow your elements with these settings.

Filters, Light And Shadows...DropShadow
Offset X - 9
Offset Y - 9
Blur Radius - 15
Opacity - 80
Color - #000000
Allow Resizing

Now resize your tag to 600x600 if you would like. 

When you are happy with your tag..
Add Copyright!!
Add Name!!
Merge All Layers!
Save!
Enjoy!!

Hope you enjoyed my tutorial. 

Saturday, August 23, 2014

My First Award

I have received my first award. 

 photo RawkMySocks-Award.png

I received this award from Rhonda at Rhonda's Rockin Designz!! Thank you so much for this award.
Now i'm passing it on to some of my favorite blogs. 

Pandora Designs 
Tasha's Playground
Leather And Lace
Gimptastic Tuts

Tuesday, August 19, 2014

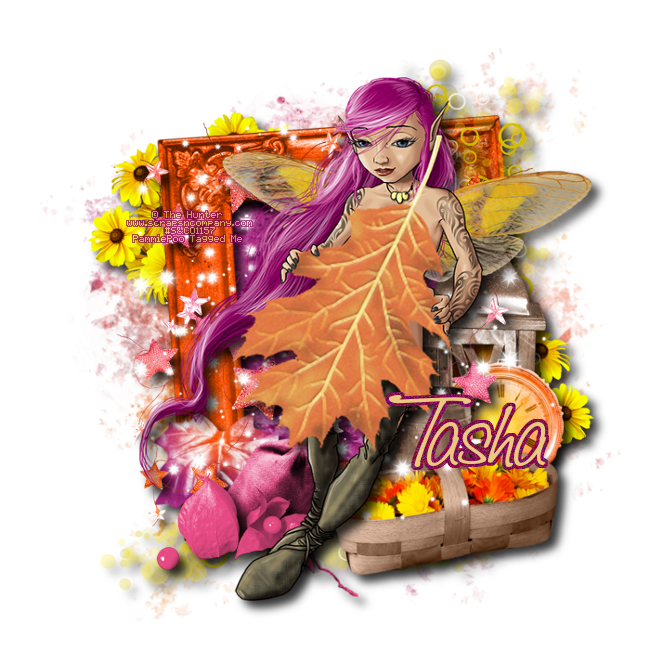
PTU - Autumn Sunrise

This tutorial was written by me on August 19, 2014. Please do not claim as your own. Any resemblance to any other tutorial is purely coincidental.
------------------------------------------------
Mask Of Choice 

Scrap Kit - PTU scrap kit called Autumn Sunrise By Tasha's Playground
You can purchase this kit here

Font Of Choice 

Tube Of Choice -  Artwork By The Hunter. Must obtain a license from S&Co to use this tube 

Program - Gimp 2.6..but any program will do.

--------------------------------------------

Open New Canvas
I did 650x650.you can resize it at the end if you would like.

Open Mask
Right click on your layers 
Go down to alpha by selection
Edit > fill w/ BG color - Make sure color is #FFFFFF

Open Paper 9
Right click on your layers
Click add layer mask
Then a window will pop up 
then click black (full transparency)
Then click add
Edit > Copy 
Edit > Paste
On Layers > click on floating selection
Then right click on layers
scroll down to anchor layer
Delete first layer!!!

You should have a mask..then a black square next to it on your layers.
Image > Merge Visible Layers 
Box should pop up..click clipped to image > Merge

-----------------------------------------------------------------

Ready...
Set...
Go...

Open Frame1
Now open paper6. Use your rectangle tool. 
Copy and paste into frame1

Open These Elements and use the same dropshadow as above and resize to your liking!!!

TP_Sunrise_e03
TP_Sunrise_e20
TP_Sunrise_e26
TP_Sunrise_e28
TP_Sunrise_e29
TP_Sunrise_e33
TP_Sunrise_e34
TP_Sunrise_e36
TP_Sunrise_e37
TP_Sunrise_e43
TP_Sunrise_e60

Now dropshadow your elements with these settings.

Filters, Light And Shadows...DropShadow
Offset X - 9
Offset Y - 9
Blur Radius - 15
Opacity - 80
Color - #000000
Allow Resizing

Now resize your tag to 600x600 if you would like. 

When you are happy with your tag..
Add Copyright!!
Add Name!!
Merge All Layers!
Save!
Enjoy!!

Hope you enjoyed my tutorial. 

Monday, August 18, 2014

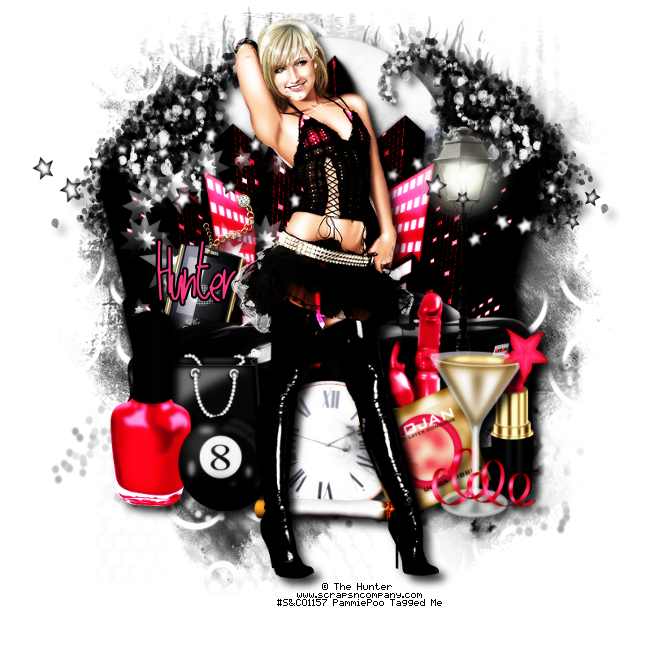
PTU - City Night

This tutorial was written by me on August 18, 2014. Please do not claim as your own. Any resemblance to any other tutorial is purely coincidental.
------------------------------------------------
Mask Of Choice 

Scrap Kit - PTU scrap kit called City Night By Designs By Joan
You can purchase this kit here

Font Of Choice 

Tube Of Choice -  Artwork By The Hunter. Must obtain a license from S&Co to use this tube 

Program - Gimp 2.6..but any program will do.

--------------------------------------------

Open New Canvas
I did 650x650.you can resize it at the end if you would like.

Open Mask
Right click on your layers 
Go down to alpha by selection
Edit > fill w/ BG color - Make sure color is #FFFFFF

Open Paper 7
Right click on your layers
Click add layer mask
Then a window will pop up 
then click black (full transparency)
Then click add
Edit > Copy 
Edit > Paste
On Layers > click on floating selection
Then right click on layers
scroll down to anchor layer
Delete first layer!!!

You should have a mask..then a black square next to it on your layers.
Image > Merge Visible Layers 
Box should pop up..click clipped to image > Merge

-----------------------------------------------------------------

Ready...
Set...
Go...

Open These Elements and use the same dropshadow as above and resize to your liking!!!

CityNight-4
CityNight10
CityNight20
CityNight28
CityNight32
CityNight40
CityNight45
CityNight46
CityNight67
CityNight69
CityNight74
CityNight77
CityNight82
CityNight85
CityNight87
CityNight92
CityNight93

Now dropshadow your elements with these settings.

Filters, Light And Shadows...DropShadow
Offset X - 9
Offset Y - 9
Blur Radius - 15
Opacity - 80
Color - #000000
Allow Resizing

Now resize your tag to 600x600 if you would like. 

When you are happy with your tag..
Add Copyright!!
Add Name!!
Merge All Layers!
Save!
Enjoy!!

Hope you enjoyed my tutorial. 

Wednesday, August 13, 2014

My Newest Kit - Zombie Land

I got alittle inspiration from the movie Zombie Land to make a kit. It has 30 elements, 14 papers and 1 frame. You can find this kit at any of the stores on the left hand side of my blog. 


Tuesday, August 12, 2014

PTU - Angel Dark

This tutorial was written by me on August 12, 2014. Please do not claim as your own. Any resemblance to any other tutorial is purely coincidental.
------------------------------------------------
Mask Of Choice 

Scrap Kit - PTU scrap kit called Angel Dark By Disturbed Scraps
You can purchase this kit here

Font Of Choice 

Tube Of Choice -  Artwork By Andy Cooper. Must obtain a license from S&Co to use this tube 

Program - Gimp 2.6..but any program will do.

--------------------------------------------

Open New Canvas
I did 650x650.you can resize it at the end if you would like.

Open Mask
Right click on your layers 
Go down to alpha by selection
Edit > fill w/ BG color - Make sure color is #FFFFFF

Open Paper 6
Right click on your layers
Click add layer mask
Then a window will pop up 
then click black (full transparency)
Then click add
Edit > Copy 
Edit > Paste
On Layers > click on floating selection
Then right click on layers
scroll down to anchor layer
Delete first layer!!!

You should have a mask..then a black square next to it on your layers.
Image > Merge Visible Layers 
Box should pop up..click clipped to image > Merge

-----------------------------------------------------------------

Ready...
Set...
Go...

Open DS - AB Element0100
Now open paper13. Now use your ellipse tool and make a circle on paper13
Copy/Paste into DS - AB Element0100

Open These Elements and use the same dropshadow as above and resize to your liking!!!

DS - AB Element008
DS - AB Element010
DS - AB Element011
DS - AB Element012
DS - AB Element017
DS - AB Element023
DS - AB Element024
DS - AB Element036
DS - AB Element040
DS - AB Element044
DS - AB Element081
DS - AB Element085
DS - AB Element086

Now dropshadow your elements with these settings.

Filters, Light And Shadows...DropShadow
Offset X - 9
Offset Y - 9
Blur Radius - 15
Opacity - 80
Color - #000000
Allow Resizing

Now resize your tag to 600x600 if you would like. 

When you are happy with your tag..
Add Copyright!!
Add Name!!
Merge All Layers!
Save!
Enjoy!!

Hope you enjoyed my tutorial. 

Saturday, August 9, 2014

PTU - Changing Sands

This tutorial was written by me on August 9, 2014. Please do not claim as your own. Any resemblance to any other tutorial is purely coincidental.
------------------------------------------------
Mask Of Choice 

Scrap Kit - PTU scrap kit called Changing Sands By Jackie's Jewels
You can purchase this kit here

Font Of Choice 

Tube Of Choice -  Artwork By Alex Prihodko. You must obtain a license from PFD to use this tube.
Program - Gimp 2.6..but any program will do.

--------------------------------------------

Open New Canvas
I did 650x650.you can resize it at the end if you would like.

Open Mask
Right click on your layers 
Go down to alpha by selection
Edit > fill w/ BG color - Make sure color is #FFFFFF

Open Paper 4
Right click on your layers
Click add layer mask
Then a window will pop up 
then click black (full transparency)
Then click add
Edit > Copy 
Edit > Paste
On Layers > click on floating selection
Then right click on layers
scroll down to anchor layer
Delete first layer!!!

You should have a mask..then a black square next to it on your layers.
Image > Merge Visible Layers 
Box should pop up..click clipped to image > Merge

-----------------------------------------------------------------

Ready...
Set...
Go...

Open JJS_1
Now open Paper13. Use your rectangle tool and make a square
Copy and paste into JJS_1

Open These Elements and use the same dropshadow as above and resize to your liking!!!

JJS_26
JJS_39
JJS_44
JJS_6
JJS_49
JJS_61
JJS_63
JJS_65
JJS_75
JJS_77
JJS_90


Now dropshadow your elements with these settings.

Filters, Light And Shadows...DropShadow
Offset X - 9
Offset Y - 9
Blur Radius - 15
Opacity - 80
Color - #000000
Allow Resizing

Now resize your tag to 600x600 if you would like. 

When you are happy with your tag..
Add Copyright!!
Add Name!!
Merge All Layers!
Save!
Enjoy!!

Hope you enjoyed my tutorial. 

Friday, August 8, 2014

PTU - 50s Diner Waitress

This tutorial was written by me on August 8, 2014. Please do not claim as your own. Any resemblance to any other tutorial is purely coincidental.
------------------------------------------------
Mask Of Choice 

Scrap Kit - PTU scrap kit called Pink By Dn Scraps
You can purchase this kit here

Font Of Choice 

Tube Of Choice -  Artwork By Danny Lee. Must obtain a license from S&Co to use this tube 

Program - Gimp 2.6..but any program will do.

--------------------------------------------

Open New Canvas
I did 650x650.you can resize it at the end if you would like.

Open Mask
Right click on your layers 
Go down to alpha by selection
Edit > fill w/ BG color - Make sure color is #FFFFFF

Open Paper 3
Right click on your layers
Click add layer mask
Then a window will pop up 
then click black (full transparency)
Then click add
Edit > Copy 
Edit > Paste
On Layers > click on floating selection
Then right click on layers
scroll down to anchor layer
Delete first layer!!!

You should have a mask..then a black square next to it on your layers.
Image > Merge Visible Layers 
Box should pop up..click clipped to image > Merge

-----------------------------------------------------------------

Ready...
Set...
Go...

Open These Elements and use the same dropshadow as above and resize to your liking!!!

Pinkkitpudn50bottlesoda
Pinkkitpudn50cakes
Pinkkitpudn50camera
Pinkkitpudn50car
Pinkkitpudn50cigarrete
Pinkkitpudn50diary
Pinkkitpudn50dinner
Pinkkitpudn50driverneon
Pinkkitpudn50heartfeathers2
Pinkkitpudn50heartlock
Pinkkitpudn50hotdog
Pinkkitpudn50jacket
Pinkkitpudn50jukebox
Pinkkitpudn50milkshake
Pinkkitpudn50music
Pinkkitpudn50tea

Now dropshadow your elements with these settings.

Filters, Light And Shadows...DropShadow
Offset X - 9
Offset Y - 9
Blur Radius - 15
Opacity - 80
Color - #000000
Allow Resizing

Now resize your tag to 600x600 if you would like. 

When you are happy with your tag..
Add Copyright!!
Add Name!!
Merge All Layers!
Save!
Enjoy!!

Hope you enjoyed my tutorial. 

Tuesday, August 5, 2014

PTU - Midnight Ocean

This tutorial was written by me on August 5, 2014. Please do not claim as your own. Any resemblance to any other tutorial is purely coincidental.
------------------------------------------------
Mask Of Choice 

Scrap Kit - PTU scrap kit called Midnight Ocean By Tasha's Playground
You can purchase this kit here

Font Of Choice 

Tube Of Choice -  Artwork By Gaetano Di Falco . Must obtain a license from CDO to use this tube 

Program - Gimp 2.6..but any program will do.

--------------------------------------------

Open New Canvas
I did 650x650.you can resize it at the end if you would like.

Open Mask
Right click on your layers 
Go down to alpha by selection
Edit > fill w/ BG color - Make sure color is #FFFFFF

Open Paper 2
Right click on your layers
Click add layer mask
Then a window will pop up 
then click black (full transparency)
Then click add
Edit > Copy 
Edit > Paste
On Layers > click on floating selection
Then right click on layers
scroll down to anchor layer
Delete first layer!!!

You should have a mask..then a black square next to it on your layers.
Image > Merge Visible Layers 
Box should pop up..click clipped to image > Merge

-----------------------------------------------------------------

Ready...
Set...
Go...

Open Frame1
Now open Paper3 . You use rectangle tool and make a square on Paper3
Copy/Paste inside Frame1

Open These Elements and use the same dropshadow as above and resize to your liking!!!

TP_MO_e04
TP_MO_e13
TP_MO_e18
TP_MO_e20
TP_MO_e22
TP_MO_e24
TP_MO_e26
TP_MO_e30
TP_MO_e47
TP_MO_e59
TP_MO_e61

Now dropshadow your elements with these settings.

Filters, Light And Shadows...DropShadow
Offset X - 9
Offset Y - 9
Blur Radius - 15
Opacity - 80
Color - #000000
Allow Resizing

Now resize your tag to 600x600 if you would like. 

When you are happy with your tag..
Add Copyright!!
Add Name!!
Merge All Layers!
Save!
Enjoy!!

Hope you enjoyed my tutorial. 

Monday, August 4, 2014

PTU - Autumn Music

This tutorial was written by me on August 4, 2014. Please do not claim as your own. Any resemblance to any other tutorial is purely coincidental.
------------------------------------------------
Mask Of Choice 

Scrap Kit - PTU scrap kit called Autumn Music By Bibi's Collections
You can purchase this kit here

Font Of Choice 

Tube Of Choice -  Artwork By Danny Lee. Must obtain a license from S&Co to use this tube 

Program - Gimp 2.6..but any program will do.

--------------------------------------------

Open New Canvas
I did 650x650.you can resize it at the end if you would like.

Open Mask
Right click on your layers 
Go down to alpha by selection
Edit > fill w/ BG color - Make sure color is #FFFFFF

Open Paper 5
Right click on your layers
Click add layer mask
Then a window will pop up 
then click black (full transparency)
Then click add
Edit > Copy 
Edit > Paste
On Layers > click on floating selection
Then right click on layers
scroll down to anchor layer
Delete first layer!!!

You should have a mask..then a black square next to it on your layers.
Image > Merge Visible Layers 
Box should pop up..click clipped to image > Merge

-----------------------------------------------------------------

Ready...
Set...
Go...

Open These Elements and use the same dropshadow as above and resize to your liking!!!

BIBIAUTUMNMUSIC ELEMS (11)
BIBIAUTUMNMUSIC ELEMS (14)
BIBIAUTUMNMUSIC ELEMS (26)
BIBIAUTUMNMUSIC ELEMS (28)
BIBIAUTUMNMUSIC ELEMS (29)
BIBIAUTUMNMUSIC ELEMS (35)
BIBIAUTUMNMUSIC ELEMS (37)
BIBIAUTUMNMUSIC ELEMS (44)
BIBIAUTUMNMUSIC ELEMS (49)
BIBIAUTUMNMUSIC ELEMS (55)
BIBIAUTUMNMUSIC ELEMS (56)
BIBIAUTUMNMUSIC ELEMS (58)
BIBIAUTUMNMUSIC ELEMS (69)
BIBIAUTUMNMUSIC ELEMS (71)


Now dropshadow your elements with these settings.

Filters, Light And Shadows...DropShadow
Offset X - 9
Offset Y - 9
Blur Radius - 15
Opacity - 80
Color - #000000
Allow Resizing

Now resize your tag to 600x600 if you would like. 

When you are happy with your tag..
Add Copyright!!
Add Name!!
Merge All Layers!
Save!
Enjoy!!

Hope you enjoyed my tutorial. 

PTU - Fall Leaf

This tutorial was written by me on August 4, 2014. Please do not claim as your own. Any resemblance to any other tutorial is purely coincidental.
------------------------------------------------
Mask Of Choice 

Scrap Kit - PTU scrap kit called Fall Leaf By Bibi's Collections
You can purchase this kit here

Font Of Choice 

Tube Of Choice -  Artwork By Danny Lee. Must obtain a license from S&Co to use this tube 

Program - Gimp 2.6..but any program will do.

--------------------------------------------

Open New Canvas
I did 650x650.you can resize it at the end if you would like.

Open Mask
Right click on your layers 
Go down to alpha by selection
Edit > fill w/ BG color - Make sure color is #FFFFFF

Open Paper 5
Right click on your layers
Click add layer mask
Then a window will pop up 
then click black (full transparency)
Then click add
Edit > Copy 
Edit > Paste
On Layers > click on floating selection
Then right click on layers
scroll down to anchor layer
Delete first layer!!!

You should have a mask..then a black square next to it on your layers.
Image > Merge Visible Layers 
Box should pop up..click clipped to image > Merge

-----------------------------------------------------------------

Ready...
Set...
Go...

Open These Elements and use the same dropshadow as above and resize to your liking!!!

BIBIFALLLEAF ELEM (17)
BIBIFALLLEAF ELEM (23)
BIBIFALLLEAF ELEM (42)
BIBIFALLLEAF ELEM (43)
BIBIFALLLEAF ELEM (46)
BIBIFALLLEAF ELEM (54)
BIBIFALLLEAF ELEM (67)
BIBIFALLLEAF ELEM (8)

Now dropshadow your elements with these settings.

Filters, Light And Shadows...DropShadow
Offset X - 9
Offset Y - 9
Blur Radius - 15
Opacity - 80
Color - #000000
Allow Resizing

Now resize your tag to 600x600 if you would like. 

When you are happy with your tag..
Add Copyright!!
Add Name!!
Merge All Layers!
Save!
Enjoy!!

Hope you enjoyed my tutorial. 

Sunday, August 3, 2014

PTU - Ocean Kiss

This tutorial was written by me on August 3, 2014. Please do not claim as your own. Any resemblance to any other tutorial is purely coincidental.
------------------------------------------------
Mask Of Choice 

Scrap Kit - PTU scrap kit called Ocean Kisses By Bibi Collections
You can purchase this kit here

Font Of Choice 

Tube Of Choice -  Artwork By The Hunter. Must obtain a license from S&Co to use this tube 

Program - Gimp 2.6..but any program will do.

--------------------------------------------

Open New Canvas
I did 650x650.you can resize it at the end if you would like.

Open Mask
Right click on your layers 
Go down to alpha by selection
Edit > fill w/ BG color - Make sure color is #FFFFFF

Open Paper 6
Right click on your layers
Click add layer mask
Then a window will pop up 
then click black (full transparency)
Then click add
Edit > Copy 
Edit > Paste
On Layers > click on floating selection
Then right click on layers
scroll down to anchor layer
Delete first layer!!!

You should have a mask..then a black square next to it on your layers.
Image > Merge Visible Layers 
Box should pop up..click clipped to image > Merge

-----------------------------------------------------------------

Ready...
Set...
Go...

Open BIBIOCEANKISS ELEMS (43)
Now open BIBIOCEANKISS PAPERS (2) . You use ellipse tool and make a circle on BIBIOCEANKISS PAPERS (2)
Copy/Paste inside BIBIOCEANKISS ELEMS (43)

Open These Elements and use the same dropshadow as above and resize to your liking!!!

BIBIOCEANKISS ELEMS (15)
BIBIOCEANKISS ELEMS (28)
BIBIOCEANKISS ELEMS (6)
BIBIOCEANKISS ELEMS (66)
BIBIOCEANKISS ELEMS (76)
BIBIOCEANKISS ELEMS (92)
BIBIOCEANKISS ELEMS (97)

Now dropshadow your elements with these settings.

Filters, Light And Shadows...DropShadow
Offset X - 9
Offset Y - 9
Blur Radius - 15
Opacity - 80
Color - #000000
Allow Resizing

Now resize your tag to 600x600 if you would like. 

When you are happy with your tag..
Add Copyright!!
Add Name!!
Merge All Layers!
Save!
Enjoy!!

Hope you enjoyed my tutorial.