Pages

Tuesday, September 30, 2014

PTU - Sometimes Love Hurts

This tutorial was written by me on September 30, 2014. Please do not claim as your own. Any resemblance to any other tutorial is purely coincidental.
------------------------------------------------
Mask Of Choice 

Scrapkit of Choice - TP_IB-AnnaMarine-37-2 by Tasha's Playground
You can purchase this kit here

Font Of Choice 

Tube Of Choice -  Artwork By Ismael Rac. You must obtain a license from his store.

Program - Gimp 2.6..but any program will do.

--------------------------------------------

Open New Canvas
I did 650x650.you can resize it at the end if you would like.

Open Mask
Right click on your layers 
Go down to alpha by selection
Edit > fill w/ BG color - Make sure color is #FFFFFF

Open Paper 4
Right click on your layers
Click add layer mask
Then a window will pop up 
then click black (full transparency)
Then click add
Edit > Copy 
Edit > Paste
On Layers > click on floating selection
Then right click on layers
scroll down to anchor layer
Delete first layer!!!

You should have a mask..then a black square next to it on your layers.
Image > Merge Visible Layers 
Box should pop up..click clipped to image > Merge

-----------------------------------------------------------------

Ready...
Set...
Go...

Open up TP_Marine-37-2_frame02
Open TP_Marine-37-2_paper01 and use your ellipse tool to make a circle
C/P inside TP_Marine-37-2_frame02

The elements I used were:

TP_Marine-37-2_e01
TP_Marine-37-2_e02
TP_Marine-37-2_e09
TP_Marine-37-2_e10
TP_Marine-37-2_e19
TP_Marine-37-2_wordart

Now dropshadow your elements with these settings.

Filters, Light And Shadows...DropShadow
Offset X - 9
Offset Y - 9
Blur Radius - 15
Opacity - 81
Color - #000000
Allow Resizing

Now resize your tag to 600x600 if you would like. 

When you are happy with your tag..
Add Copyright!!
Add Name!!
Merge All Layers!
Save!
Enjoy!!

Hope you enjoyed my tutorial. 


Sunday, September 28, 2014

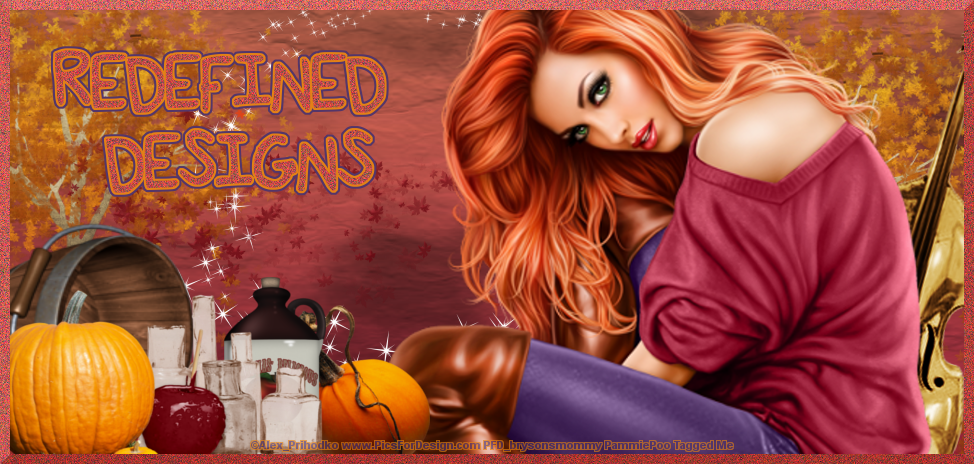
PTU - Crazy Bride


This tutorial was written by me on September 28, 2014. Please do not claim as your own. Any resemblance to any other tutorial is purely coincidental.
------------------------------------------------
Mask Of Choice 

Scrap Kit - PTU scrap kit called Crazy Bride By Bibi's Collections
You can purchase this kit here

Font Of Choice 

Tube Of Choice -  Artwork By Danny Lee. You must obtain a license from S&Co to use this tube.

Program - Gimp 2.6..but any program will do.

--------------------------------------------

Open New Canvas
I did 650x650.you can resize it at the end if you would like.

Open Mask
Right click on your layers 
Go down to alpha by selection
Edit > fill w/ BG color - Make sure color is #FFFFFF

Open Paper 5
Right click on your layers
Click add layer mask
Then a window will pop up 
then click black (full transparency)
Then click add
Edit > Copy 
Edit > Paste
On Layers > click on floating selection
Then right click on layers
scroll down to anchor layer
Delete first layer!!!

You should have a mask..then a black square next to it on your layers.
Image > Merge Visible Layers 
Box should pop up..click clipped to image > Merge

-----------------------------------------------------------------

Ready...
Set...
Go...

The elements I used were:

BIBICRAZYBRIDE ELEMS (14)
BIBICRAZYBRIDE ELEMS (2)
BIBICRAZYBRIDE ELEMS (21)
BIBICRAZYBRIDE ELEMS (24)
BIBICRAZYBRIDE ELEMS (26)
BIBICRAZYBRIDE ELEMS (42)
BIBICRAZYBRIDE ELEMS (44)
BIBICRAZYBRIDE ELEMS (46)
BIBICRAZYBRIDE ELEMS (52)
BIBICRAZYBRIDE ELEMS (74)
BIBICRAZYBRIDE ELEMS (8)

Now dropshadow your elements with these settings.

Filters, Light And Shadows...DropShadow
Offset X - 9
Offset Y - 9
Blur Radius - 15
Opacity - 80
Color - #000000
Allow Resizing

Now resize your tag to 600x600 if you would like. 

When you are happy with your tag..
Add Copyright!!
Add Name!!
Merge All Layers!
Save!
Enjoy!!

Hope you enjoyed my tutorial. 

Monday, September 22, 2014

PTU - Hallowitch

This tutorial was written by me on September 22, 2014. Please do not claim as your own. Any resemblance to any other tutorial is purely coincidental.
------------------------------------------------
Mask Of Choice 

Scrap Kit - PTU scrap kit called Hallowitch By Devilish Dezines
You can purchase this kit here

Font Of Choice 

Tube Of Choice -  Artwork By Vi Nina. You must obtain a license from S&CO to use this tube.

Program - Gimp 2.6..but any program will do.

--------------------------------------------

Open New Canvas
I did 650x650.you can resize it at the end if you would like.

Open Mask
Right click on your layers 
Go down to alpha by selection
Edit > fill w/ BG color - Make sure color is #FFFFFF

Open Paper 6
Right click on your layers
Click add layer mask
Then a window will pop up 
then click black (full transparency)
Then click add
Edit > Copy 
Edit > Paste
On Layers > click on floating selection
Then right click on layers
scroll down to anchor layer
Delete first layer!!!

You should have a mask..then a black square next to it on your layers.
Image > Merge Visible Layers 
Box should pop up..click clipped to image > Merge

-----------------------------------------------------------------

Ready...
Set...
Go...

Open up Frame4
Open Paper3 and use your ellipse tool to make a circle on paper3
C/P inside Frame4

The elements I used were:

element16
element18
element27
element29
element33
element35
element4
element42
element44
element46
element9

Now dropshadow your elements with these settings.

Filters, Light And Shadows...DropShadow
Offset X - 9
Offset Y - 9
Blur Radius - 15
Opacity - 80
Color - #000000
Allow Resizing

Now resize your tag to 600x600 if you would like. 

When you are happy with your tag..
Add Copyright!!
Add Name!!
Merge All Layers!
Save!
Enjoy!!

Hope you enjoyed my tutorial. 

Sunday, September 21, 2014

PTU - Blue Jay

This tutorial was written by me on September 21, 2014. Please do not claim as your own. Any resemblance to any other tutorial is purely coincidental.
------------------------------------------------
Mask Of Choice 
Scrap Kit - PTU scrap kit called Birthstone: Sapphire By Tasha's Playground
You can purchase this kit here
Font Of Choice 
Tube Of Choice -  Artwork By Abranda Icle Sisson. You must obtain a license from TPP to use this tube.
Program - Gimp 2.6..but any program will do.
--------------------------------------------
Open New Canvas
I did 650x650.you can resize it at the end if you would like.
Open Mask
Right click on your layers 
Go down to alpha by selection
Edit > fill w/ BG color - Make sure color is #FFFFFF
Open Paper 2
Right click on your layers
Click add layer mask
Then a window will pop up 
then click black (full transparency)
Then click add
Edit > Copy 
Edit > Paste
On Layers > click on floating selection
Then right click on layers
scroll down to anchor layer
Delete first layer!!!
You should have a mask..then a black square next to it on your layers.
Image > Merge Visible Layers 
Box should pop up..click clipped to image > Merge
-----------------------------------------------------------------
Ready...
Set...
Go...
Open up TP_Sapphire_frame01
Open TP_Sapphire_paper01 and use your rectangle tool to make a square
C/P inside TP_Sapphire_frame01
The elements I used were:
TP_Sapphire_e02
TP_Sapphire_e08
TP_Sapphire_e10
TP_Sapphire_e11
TP_Sapphire_e13
TP_Sapphire_e15
TP_Sapphire_e19
TP_Sapphire_e21
TP_Sapphire_e24
TP_Sapphire_e25
TP_Sapphire_e31
TP_Sapphire_e32
Now dropshadow your elements with these settings.
Filters, Light And Shadows...DropShadow
Offset X - 9
Offset Y - 9
Blur Radius - 15
Opacity - 80
Color - #000000
Allow Resizing
Now resize your tag to 600x600 if you would like. 
When you are happy with your tag..
Add Copyright!!
Add Name!!
Merge All Layers!
Save!
Enjoy!!
Hope you enjoyed my tutorial. 

PTU - Spellbound

This tutorial was written by me on September 21, 2014. Please do not claim as your own. Any resemblance to any other tutorial is purely coincidental.
------------------------------------------------
Mask Of Choice 

Scrap Kit - PTU scrap kit called Spellbound By Jackie's Jewels
You can purchase this kit here

Font Of Choice 

Tube Of Choice -  Artwork By Keith Garvey. You must obtain a license from his store to use this tube.

Program - Gimp 2.6..but any program will do.

--------------------------------------------

Open New Canvas
I did 650x650.you can resize it at the end if you would like.

Open Mask
Right click on your layers 
Go down to alpha by selection
Edit > fill w/ BG color - Make sure color is #FFFFFF

Open Paper 11
Right click on your layers
Click add layer mask
Then a window will pop up 
then click black (full transparency)
Then click add
Edit > Copy 
Edit > Paste
On Layers > click on floating selection
Then right click on layers
scroll down to anchor layer
Delete first layer!!!

You should have a mask..then a black square next to it on your layers.
Image > Merge Visible Layers 
Box should pop up..click clipped to image > Merge

-----------------------------------------------------------------

Ready...
Set...
Go...

The elements I used were:

JJS_10
JJS_102
JJS_110
JJS_115
JJS_17
JJS_18
JJS_19
JJS_33
JJS_44
JJS_6
JJS_64
JJS_7
JJS_8
JJS_94

Now dropshadow your elements with these settings.

Filters, Light And Shadows...DropShadow
Offset X - 9
Offset Y - 9
Blur Radius - 15
Opacity - 80
Color - #000000
Allow Resizing

Now resize your tag to 600x600 if you would like. 

When you are happy with your tag..
Add Copyright!!
Add Name!!
Merge All Layers!
Save!
Enjoy!!

Hope you enjoyed my tutorial. 

Thursday, September 18, 2014

PTU - Orange Autumn


This tutorial was written by me on September 18, 2014. Please do not claim as your own. Any resemblance to any other tutorial is purely coincidental.
------------------------------------------------
Mask Of Choice 

Scrap Kit - PTU scrap kit called Orange Autumn By Kissing Kate
You can purchase this kit here

Font Of Choice 

Tube Of Choice -  Artwork By Danny Lee. You must obtain a license from S&Co to use this tube.

Program - Gimp 2.6..but any program will do.

--------------------------------------------

Open New Canvas
I did 650x650.you can resize it at the end if you would like.

Open Mask
Right click on your layers 
Go down to alpha by selection
Edit > fill w/ BG color - Make sure color is #FFFFFF

Open Paper 1
Right click on your layers
Click add layer mask
Then a window will pop up 
then click black (full transparency)
Then click add
Edit > Copy 
Edit > Paste
On Layers > click on floating selection
Then right click on layers
scroll down to anchor layer
Delete first layer!!!

You should have a mask..then a black square next to it on your layers.
Image > Merge Visible Layers 
Box should pop up..click clipped to image > Merge

-----------------------------------------------------------------

Ready...
Set...
Go...

The elements I used were:

ELEMENT 10
ELEMENT 15
ELEMENT 20
ELEMENT 33
ELEMENT 41
ELEMENT 45
ELEMENT 49
ELEMENT 5
ELEMENT 50
ELEMENT 54
ELEMENT 55
ELEMENT 56
ELEMENT 57
ELEMENT 61
ELEMENT 65
ELEMENT 8
FRAME 3

Now dropshadow your elements with these settings.

Filters, Light And Shadows...DropShadow
Offset X - 9
Offset Y - 9
Blur Radius - 15
Opacity - 80
Color - #000000
Allow Resizing

Now resize your tag to 600x600 if you would like. 

When you are happy with your tag..
Add Copyright!!
Add Name!!
Merge All Layers!
Save!
Enjoy!!

Hope you enjoyed my tutorial. 

Monday, September 15, 2014

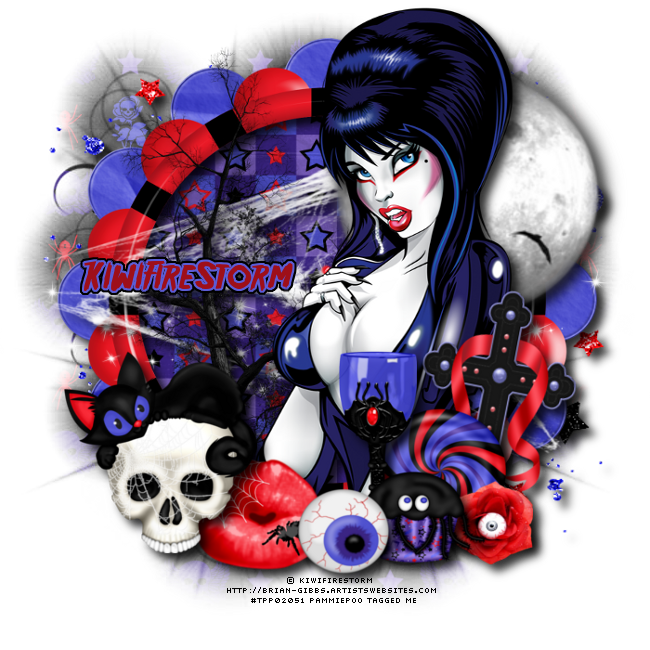
PTU - Elvira

This tutorial was written by me on September 15, 2014. Please do not claim as your own. Any resemblance to any other tutorial is purely coincidental.
------------------------------------------------
Mask Of Choice 

Scrap Kit - PTU scrap kit called Elvira  By Toxic Desirez
You can purchase this kit here

Font Of Choice 

Tube Of Choice -  Artwork By KiwiFireStorm. You must obtain a license from TPP to use this tube.

Program - Gimp 2.6..but any program will do.

--------------------------------------------

Open New Canvas
I did 650x650.you can resize it at the end if you would like.

Open Mask
Right click on your layers 
Go down to alpha by selection
Edit > fill w/ BG color - Make sure color is #FFFFFF

Open Paper 22
Right click on your layers
Click add layer mask
Then a window will pop up 
then click black (full transparency)
Then click add
Edit > Copy 
Edit > Paste
On Layers > click on floating selection
Then right click on layers
scroll down to anchor layer
Delete first layer!!!

You should have a mask..then a black square next to it on your layers.
Image > Merge Visible Layers 
Box should pop up..click clipped to image > Merge

-----------------------------------------------------------------

Ready...
Set...
Go...

Open up Frame2
Open paper  and use your rectangle tool to make a square
C/P inside Frame2

The elements I used were:

Kristin - Elvira - Candy 1
Kristin - Elvira - Cross
Kristin - Elvira - Cupcake
Kristin - Elvira - Eye
Kristin - Elvira - Goblet
Kristin - Elvira - Kitty & Skull
Kristin - Elvira - Lips
Kristin - Elvira - Moon
Kristin - Elvira - Rose & Eye
Kristin - Elvira - Sparkles
Kristin - Elvira - Splatter
Kristin - Elvira - Tree
Kristin - Elvira - Web

Now dropshadow your elements with these settings.

Filters, Light And Shadows...DropShadow
Offset X - 9
Offset Y - 9
Blur Radius - 15
Opacity - 80
Color - #000000
Allow Resizing

Now resize your tag to 600x600 if you would like. 

When you are happy with your tag..
Add Copyright!!
Add Name!!
Merge All Layers!
Save!
Enjoy!!

Hope you enjoyed my tutorial. 

Wednesday, September 10, 2014

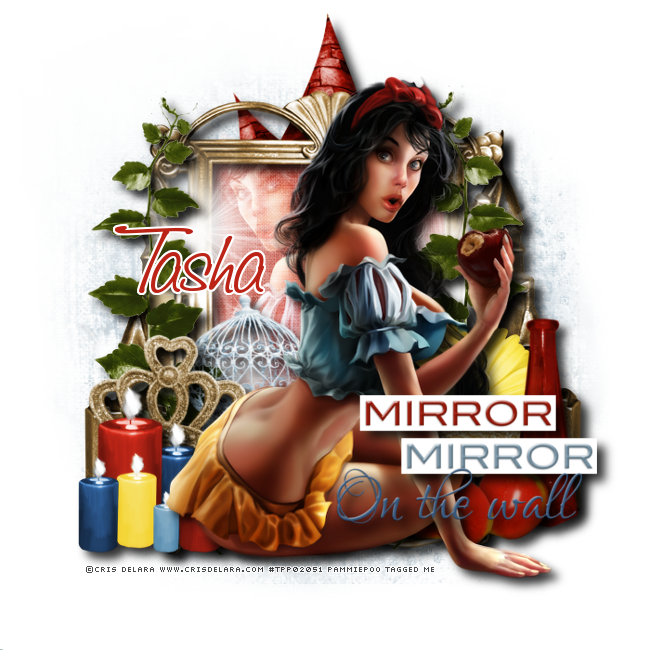
PTU - Mirror Mirror On The Wall

This tutorial was written by me on September 10, 2014. Please do not claim as your own. Any resemblance to any other tutorial is purely coincidental.
------------------------------------------------
Mask Of Choice 

Scrap Kit - PTU scrap kit called Fairytale Fantasy By Tasha's Playground
You can purchase this kit here

Font Of Choice 

Tube Of Choice -  Artwork By Cris Delara. You must obtain a license from TPP to use this tube.

Program - Gimp 2.6..but any program will do.

--------------------------------------------

Open New Canvas
I did 650x650.you can resize it at the end if you would like.

Open Mask
Right click on your layers 
Go down to alpha by selection
Edit > fill w/ BG color - Make sure color is #FFFFFF

Open Paper 5
Right click on your layers
Click add layer mask
Then a window will pop up 
then click black (full transparency)
Then click add
Edit > Copy 
Edit > Paste
On Layers > click on floating selection
Then right click on layers
scroll down to anchor layer
Delete first layer!!!

You should have a mask..then a black square next to it on your layers.
Image > Merge Visible Layers 
Box should pop up..click clipped to image > Merge

-----------------------------------------------------------------

Ready...
Set...
Go...

Open up TP_FF_frame03
Open paper 2 and use your rectangle tool to make a square
C/P inside TP_FF_frame03

The elements I used were:

TP_FF_e02
TP_FF_e03
TP_FF_e06
TP_FF_e12
TP_FF_e20
TP_FF_e29
TP_FF_e30
TP_FF_e39
TP_FF_e53
TP_FF_e60
TP_FF_e63

Now dropshadow your elements with these settings.

Filters, Light And Shadows...DropShadow
Offset X - 9
Offset Y - 9
Blur Radius - 15
Opacity - 80
Color - #000000
Allow Resizing

Now resize your tag to 600x600 if you would like. 

When you are happy with your tag..
Add Copyright!!
Add Name!!
Merge All Layers!
Save!
Enjoy!!

Hope you enjoyed my tutorial. 

Monday, September 8, 2014

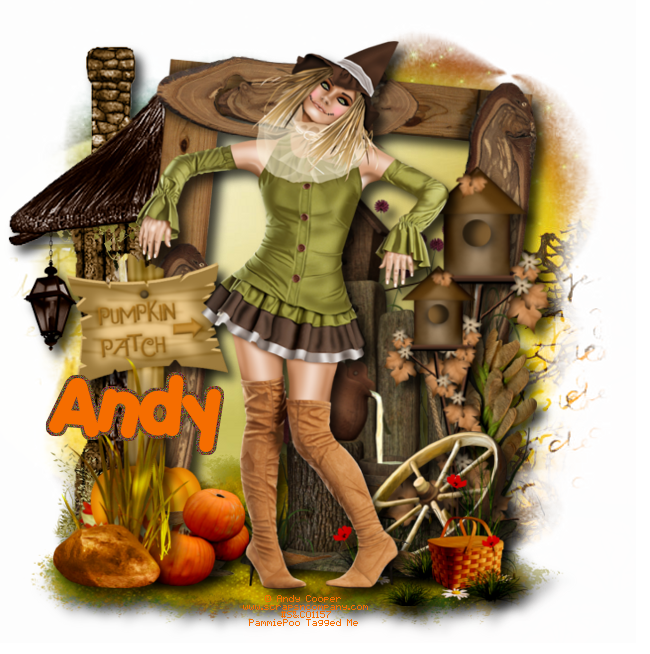
PTU - Scarecrow

This tutorial was written by me on September 8, 2014. Please do not claim as your own. Any resemblance to any other tutorial is purely coincidental.
------------------------------------------------
Mask Of Choice 

Scrap Kit - PTU scrap kit called Scarecrow By Ginniebug Designz
You can purchase this kit here

Font Of Choice 

Tube Of Choice -  Artwork By Andy Cooper. You must obtain a license from S&Co to use this tube.

Program - Gimp 2.6..but any program will do.

--------------------------------------------

Open New Canvas
I did 650x650.you can resize it at the end if you would like.

Open Mask
Right click on your layers 
Go down to alpha by selection
Edit > fill w/ BG color - Make sure color is #FFFFFF

Open Paper 19
Right click on your layers
Click add layer mask
Then a window will pop up 
then click black (full transparency)
Then click add
Edit > Copy 
Edit > Paste
On Layers > click on floating selection
Then right click on layers
scroll down to anchor layer
Delete first layer!!!

You should have a mask..then a black square next to it on your layers.
Image > Merge Visible Layers 
Box should pop up..click clipped to image > Merge

-----------------------------------------------------------------

Ready...
Set...
Go...

Open up s61
Open paper 7 and use your rectangle tool to make a square
C/P inside s61

The elements I used were:

s29
s40
s46
s51
s57
s71
s89
s9
s92
s95
s99

Now dropshadow your elements with these settings.

Filters, Light And Shadows...DropShadow
Offset X - 9
Offset Y - 9
Blur Radius - 15
Opacity - 74
Color - #000000
Allow Resizing

Now resize your tag to 600x600 if you would like. 

When you are happy with your tag..
Add Copyright!!
Add Name!!
Merge All Layers!
Save!
Enjoy!!

Hope you enjoyed my tutorial. 
Friday, September 5, 2014

PTU - Suniel

This tutorial was written by me on September 6, 2014. Please do not claim as your own. Any resemblance to any other tutorial is purely coincidental.
------------------------------------------------
Mask Of Choice 

Scrap Kit - PTU scrap kit called Suniel By Disturbed Scraps
You can purchase this kit here

Font Of Choice 

Tube Of Choice -  Artwork By Pandora Creations. You must obtain a license from S&Co to use this tube.

Program - Gimp 2.6..but any program will do.

--------------------------------------------

Open New Canvas
I did 650x650.you can resize it at the end if you would like.

Open Mask
Right click on your layers 
Go down to alpha by selection
Edit > fill w/ BG color - Make sure color is #FFFFFF

Open Paper 5
Right click on your layers
Click add layer mask
Then a window will pop up 
then click black (full transparency)
Then click add
Edit > Copy 
Edit > Paste
On Layers > click on floating selection
Then right click on layers
scroll down to anchor layer
Delete first layer!!!

You should have a mask..then a black square next to it on your layers.
Image > Merge Visible Layers 
Box should pop up..click clipped to image > Merge

-----------------------------------------------------------------

Ready...
Set...
Go...

The elements I used were:

DS - Suniel Element (15)
DS - Suniel Element (34)
DS - Suniel Element (42)
DS - Suniel Element (43)
DS - Suniel Element (44)
DS - Suniel Element (55)
DS - Suniel Element (58)
DS - Suniel Element (59)
DS - Suniel Element (8)
DS - Suniel Element (9)

Now dropshadow your elements with these settings.

Filters, Light And Shadows...DropShadow
Offset X - 9
Offset Y - 9
Blur Radius - 15
Opacity - 80
Color - #000000
Allow Resizing

Now resize your tag to 600x600 if you would like. 

When you are happy with your tag..
Add Copyright!!
Add Name!!
Merge All Layers!
Save!
Enjoy!!

Hope you enjoyed my tutorial. 
Wednesday, September 3, 2014

PTU - Black Angel

This tutorial was written by me on September 3, 2014. Please do not claim as your own. Any resemblance to any other tutorial is purely coincidental.
------------------------------------------------
Mask Of Choice 

Scrap Kit - PTU scrap kit called Black Angel By DNSCRAPS
You can purchase this kit here

Font Of Choice 

Tube Of Choice -  Artwork By Danny Lee. You must obtain a license from S&Co to use this tube.

Program - Gimp 2.6..but any program will do.

--------------------------------------------

Open New Canvas
I did 650x650.you can resize it at the end if you would like.

Open Mask
Right click on your layers 
Go down to alpha by selection
Edit > fill w/ BG color - Make sure color is #FFFFFF

Open Paper 7
Right click on your layers
Click add layer mask
Then a window will pop up 
then click black (full transparency)
Then click add
Edit > Copy 
Edit > Paste
On Layers > click on floating selection
Then right click on layers
scroll down to anchor layer
Delete first layer!!!

You should have a mask..then a black square next to it on your layers.
Image > Merge Visible Layers 
Box should pop up..click clipped to image > Merge

-----------------------------------------------------------------

Ready...
Set...
Go...

The elements I used were:

Blackangelkitpangel
Blackangelkitpcup
Blackangelkitpedge
Blackangelkitpraven
Blackangelkitprazobarck
Blackangelkitpskullwing
Blackangelkitpuangelicalheart
Blackangelkitpububbles
Blackangelkitpucandleskull
Blackangelkitpucastle
Blackangelkitpupoisonbottle
Blackangelkitpuray22
Blackangelkitpurevenger
Blackangelkitpuskullrose
Blackangelkitpuwindows

Now dropshadow your elements with these settings.

Filters, Light And Shadows...DropShadow
Offset X - 9
Offset Y - 9
Blur Radius - 15
Opacity - 80
Color - #000000
Allow Resizing

Now resize your tag to 600x600 if you would like. 

When you are happy with your tag..
Add Copyright!!
Add Name!!
Merge All Layers!
Save!
Enjoy!!

Hope you enjoyed my tutorial.